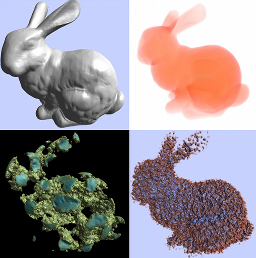
General disclaimer
As researchers with code resulting from research, we sure won't match industrial quality standards or long term maintenance: have the code as it is ! In particular our reengineering effort + tutos coding ran out of fondings before full completeness, so the state of tutos and ease of installation is not as pedagogical as we would have like. But they do provide example code for many different uses ! See published papers & videos and use your extrapolative imagination to complete the list.Detailled manual:
Full doc is here ! ( Disclaimer: alpha-version )
Beside, look below and :
Demos survival guide
(see below for GvViewer / standalone demos specific issues)- By default auto-subdivision of volumes is off, and max level is ultra-low (sorry for that... ). -> see below how to tune them.
- GPU memory max usage quota is set by default at a small value to illustrate the caching/production behavior (red screen means cache full). Requested size seems hardcoded in each demo.
- Some key shortcuts are useful or crucial:
- h: QGLviewer help pannel (pure GvViewer keys are not listed; sorry for that...)
- +/-: force subdivision level.
- t: display octree and node status.
- d: freeze cache (then camera can explore it).
- c: clear cache (force full rebuild).
- f: display FPS.
- i,u: perfmon toggles.
- not that you can settle and play a camera path, capture image... see Help.
- Some demo are based on specially prepared data files, and will crash on others.
- Note that some tutos differ by the programming approach more than by what you see. See detailled manual or sources.
- Only the polished demos got to the binary set. SDK sources contain 18 more.
- Be sure your GPU preferences are configured so that a stucked CUDA code get recoverable. Windows: see here.
GvViewer : survival guide
- To start, load a demo from file menu / open.
- On some OS the renderer tab (middle) width is 0: enlarge it with mouse.
- To activate shaders and tuning tabs, do clic on the demo name in "pipeline browser" (top left).
- Take care of side effects: camera and lights position and
direction from the last demo you watch might look away from the new
scene :-)
In case of doubt of other side effect, just quit and come back ;-) - By default auto-subdivision of volumes is off, and max level is ultra-low (sorry for that... ). -> Go to right tabs / renderer, set high max depth and clic dynamics update. Or use +/-.
- Various other quality/performance tunings are available: in right tabs / renderer, see request strategy and time budget.
- Some extra key shortcuts might be available:
- l,r: tune or reset light (in GvSignedDistanceFieldVoxelization).
Standalone demos & tutos : survival guide
- By default auto-subdivision of volumes is off, and max level is ultra-low (sorry for that... ). -> tune max subdiv with +/-.
- Some extra key shortcuts might be available:
- l,r: tune or reset light.
- e: open transfer function editor.
- pageup/down,home/end,insert/del : demo-dependant tunings (in DepthOfField, ClippingPlane, SimpleTriangles, MandelbrotSet).
- digits: demo-dependant tunings (in SmartPerlinNoise).
- Note that Voxelizer demo needs installation of ImageMagick.